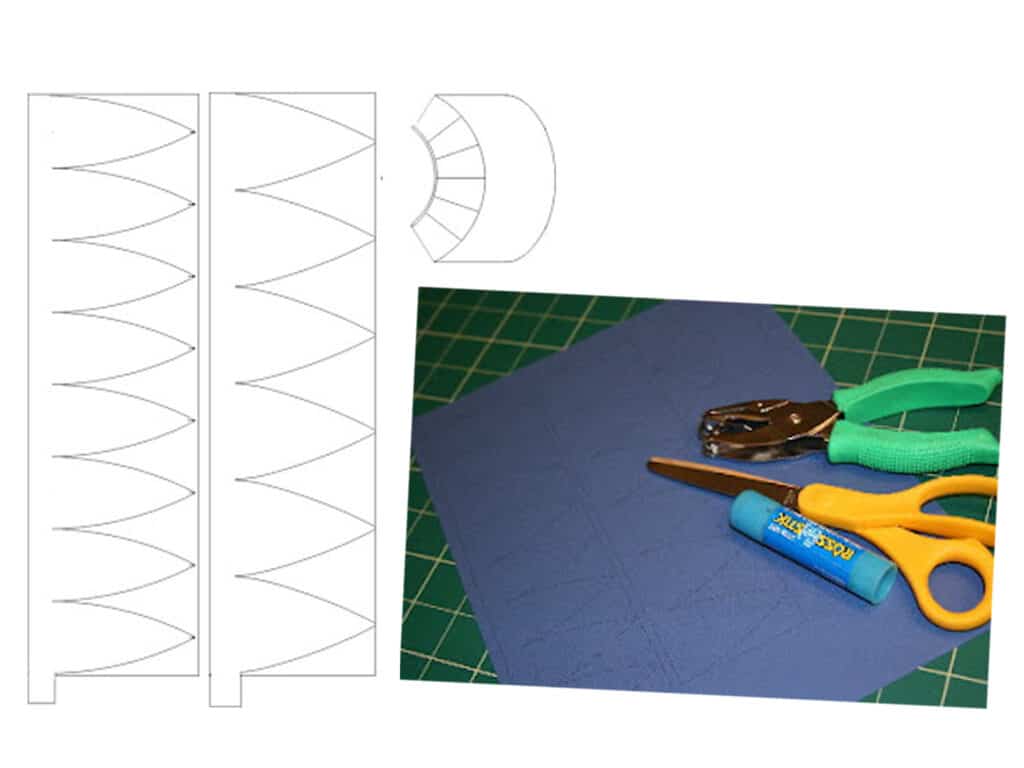
Begin by printing out the template on cardstock paper. You may use the color of choice I started with a printed template that was about 8″ long. Craft foam would probably work great if you decided to make larger caps
Step 2
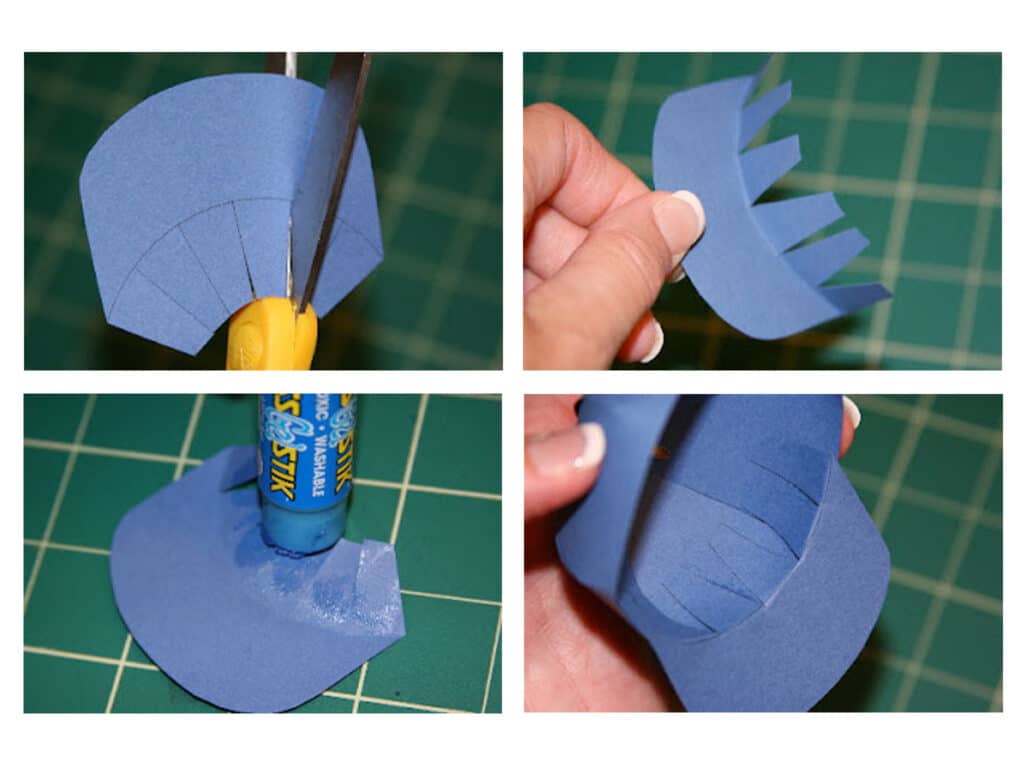
First, carefully cut out the “teeth.”
Punch a small hole in the tip of each point.
Begin gathering the tips together, lining up the punched holes.
Insert a brad into the holes to secure the points in the center. Spread the tips of the brad to secure in place. (Do this loosely at first so you can continue to adjust the panels as needed.)
Step 3
Next, cut out the brim of the cap.
Fold the tabs back to the guideline.
Apply glue to the tabs only.
Align the brim with the front of the cap and press the tabs in place inside the cap.
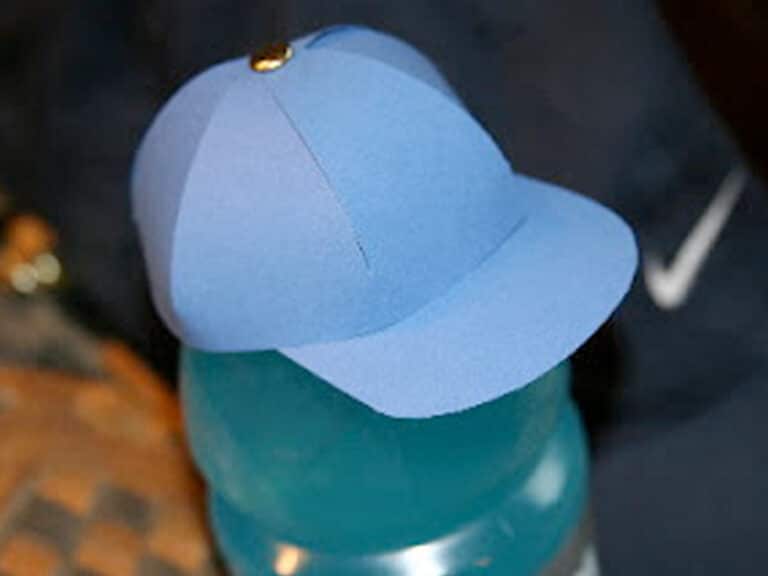
You're Finished!
And with that step, your cap is complete!
You can also personalize the caps by printing something on the front panel, like the team name or logo, or a player’s number.
These caps can be used to place on top of your child’s water bottle during games or recess to remind them which bottle is theirs. The template can be adjusted to make any size cap. So you can do really small ones to place over a Reese’s cup to use as a party favor, or larger ones to use to hang from the ceiling for party decorations.